> ## Documentation Index
> Fetch the complete documentation index at: https://docs.ryft.io/llms.txt
> Use this file to discover all available pages before exploring further.
# BYOC Deployment
> Deploy the Ryft data plane in your own AWS account with Bring Your Own Cloud. Configure IAM roles via CloudFormation or Terraform for secure access.
## Overview
Ryft's Bring Your Own Cloud (BYOC) deployment model lets you deploy the platform's data plane infrastructure in a cloud environment that you own and control.
This ensures that all data remains entirely within your cloud boundaries, while Ryft's control plane connects securely to this account and handles provisioning, ongoing updates, and maintenance.
In this guide, we will use the following terms for the different accounts:
The dedicated account you will create to host the data plane components will be referred to as the ***data plane account***
Your existing account that hosts your lakehouse components (catalog, storage, etc.) will be referred to as the ***lakehouse account***
## Step 1: Allocate a Dedicated AWS Account
Following AWS best practices, the preferred approach is to deploy Ryft in a dedicated AWS account, providing clear isolation for identity, resources, quotas, and access control.
This account will be managed by Ryft’s control plane and used to provision and operate the data plane components, including services like VPCs, EMR, and S3 buckets.
Create a new AWS sub-account in your organization. We recommend naming the account `ryft-data-plane`, and placing it in `OU=Infrastructure/OU=Managed`.
## Step 2: Request Your External IDs
Reach out to your Ryft representative to begin your BYOC setup. They will provide you with unique AWS external IDs used to establish secure cross-account access via IAM.
## Step 3: Configure IAM Access to Data Plane Account
Create cross-account IAM roles in the **data plane account**. This allows Ryft to securely manage infrastructure with scoped permissions.
The easiest way to get started is using our provided CloudFormation template.
Click [here](https://console.aws.amazon.com/cloudformation/home#/stacks/quickcreate?stackName=Ryft-Access\&templateURL=https://ryft-public-us-east-1.s3.us-east-1.amazonaws.com/integrations-templates/byoc/RyftBYOC.yaml) to launch the CloudFormation stack and deploy the required IAM role into your AWS account.
If you prefer to use Terraform, you can download and use the module [here](https://ryft-public-us-east-1.s3.us-east-1.amazonaws.com/integrations-templates/byoc/RyftBYOC.tf) to create the IAM role.
Once the IAM setup is done, contact Ryft with the ARNs of the 3 roles created to provision the account to finalize the setup.
## Step 4: Create the Data Plane Access Role in Your Lakehouse Account
In your **lakehouse account**, create an IAM role:
The easiest way to get started is using the data plane role CloudFormation template.
Click [here](https://console.aws.amazon.com/cloudformation/home#/stacks/quickcreate?stackName=Ryft-DataPlaneRole\&templateURL=https://ryft-public-us-east-1.s3.us-east-1.amazonaws.com/integrations-templates/RyftDataPlaneRole.yaml) to launch the CloudFormation stack and deploy the required IAM role into your AWS account.
If you prefer to use Terraform, you can download and use the data plane role module [here](https://ryft-public-us-east-1.s3.us-east-1.amazonaws.com/integrations-templates/RyftDataPlaneRole.tf) to create the IAM role.
Alternatively, you can create the role manually:
1. Log in to your AWS account
2. Navigate to **IAM -> Roles**
3. Click **Create Role**
4. Give the role a name, e.g. `Ryft-DataPlaneRole`
5. Click **Next: Permissions**
6. Click **Attach existing policies**
Attach the following policies:
#### Glue Catalog Access
```json theme={null}
{
"Sid": "RyftGlueDataPlaneAccess",
"Effect": "Allow",
"Action": [
"glue:GetTable",
"glue:GetTables",
"glue:GetDatabases",
"glue:GetDatabase",
"glue:UpdateTable",
"glue:CreateTable",
"glue:DeleteTable"
],
"Resource": [
"arn:aws:glue:::catalog",
"arn:aws:glue:::database/*",
"arn:aws:glue:::table/*"
]
}
```
**Note:** Replace `` and `` with your AWS region and account ID.
#### S3 Bucket Access
```json theme={null}
{
"Sid": "AllowRyftExecutionRoleAccess",
"Effect": "Allow",
"Action":[
"s3:GetObject",
"s3:PutObject",
"s3:DeleteObject",
"s3:ListBucket",
"s3:GetBucketLocation",
"s3:GetObjectVersion",
"s3:GetObjectTagging",
"s3:PutObjectTagging"
],
"Resource": [
"arn:aws:s3:::/*",
"arn:aws:s3:::"
]
}
```
**Important:** Replace `` with your actual S3 bucket name.
Configure a trust relationship for the role, use the ExecutionRole ARN and Data Plane Role External ID provided by Ryft:
```json theme={null}
{
"Version": "2012-10-17",
"Statement": [
{
"Effect": "Allow",
"Principal": {
"AWS": "arn:aws:iam:::role/Ryft-ExecutionRole"
},
"Action": "sts:AssumeRole",
"Condition": {
"StringEquals": {
"sts:ExternalId": ""
}
}
}
]
}
```
Once the IAM role is created, share the ARN of the role with your Ryft representative.
## Step 5: Create the Control Plane Access Role in Your Lakehouse Account
If you did not yet integrate the Ryft control plane with your **lakehouse account**, make sure to create it by following the steps [here](/integrations/aws-role-setup).
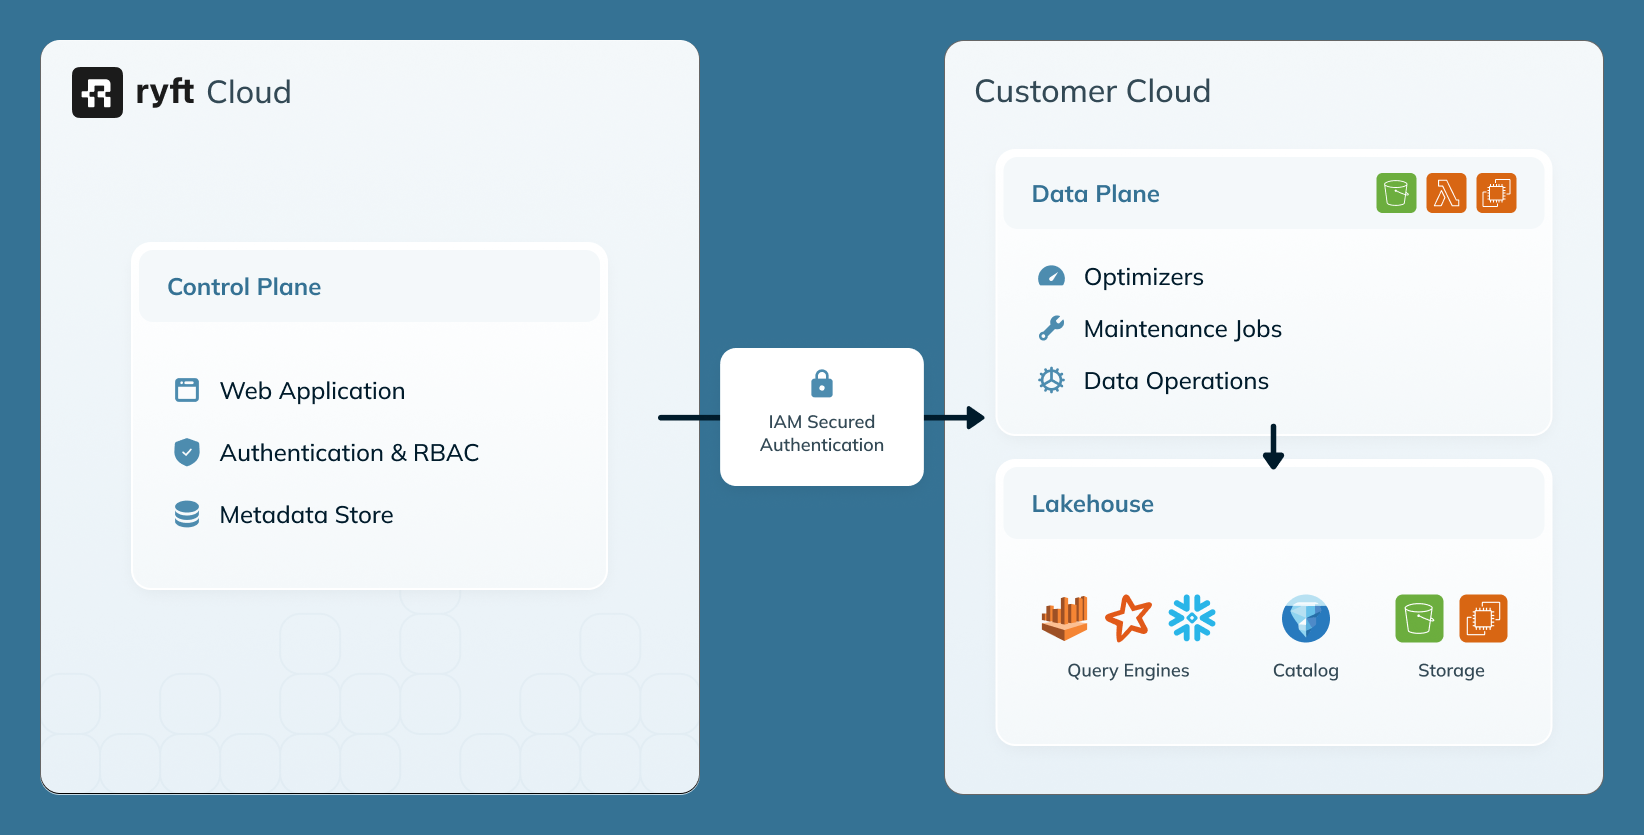 This article contains instructions for setting up the BYOC data plane deployment.
For a general overview of the Ryft architecture and deployment models, refer to [System Architecture](/administration/architecture).
When using a BYOC deployment, it's recommended to turn off event recording for `AWS::EC2::NetworkInterface` in AWS Config
Follow the recommendation of AWS as described [here](https://repost.aws/knowledge-center/emr-serverless-reduce-costs)
AWS Config -> Settings -> Edit Recorder Settings -> Override settings -> Exclude AWS::EC2::NetworkInterface from recording